First of all, Happy First Day of December and I hope you all had a great Thanksgiving! We woke up to snow falling here today, so pretty and a great way to kick off the Christmas season.
Now, time for the reveal of our downstairs half bath! Sorry it took so long ;-)
Click
here to see the before pics or here is a reminder:
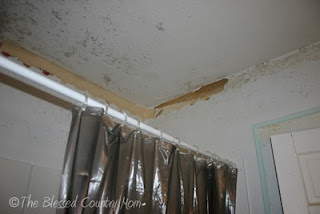
It was quite, ahem, lovely, wasn't it? You should have seen it the way it was for the last, oh, 2+ years! We had started to tear it out and then it just sat...and sat...and SAT. Until, my wonderful husband finally announced that we were just going to hire someone to do BOTH bathrooms (ugh, wait til you see the before pics of the upstairs bathroom, YUCK!)
So here is the finished downstairs half bath. Well, not COMPLETELY finished, I still need to finish decorating, but its a million times better than before!
Alrighty, here we go! Just a couple pics because, well, its a tiny bathroom and there's not much to show ;-)
My pretty vanity, I wanted it the moment I saw it. Its from Lowe's. We had to get the smallest version because the next one up was just a hair too big for the space. I used oil rubbed bronze light fixtures - that was a fun search, NOT! I had to get the kind with the on/off switch on them because we didn't have a good way to wire them both to a switch and it would have been silly to put a switch under just one....I spent at least 1 day online searching, then when I was about to settle for something that wasn't quite right...I found these on a site I had already looked at...then found them on amazon.com (where I had also searched before!). I swear they added them overnight!
Oil rubbed bronze faucet (from Lowe's). Oil rubbed bronze looking towel and tp holder. Not quite actual oil rubbed bronze, but it was cheaper than the others and works fine for me!
Jim insisted on having a medicine cabinet, so we got the one above (kinda hard to take a good pic), also from Lowe's. It doesn't "go with" the vanity, but its a close enough match. I am glad we got it now, more storage is a plus! Oh and it had to go over the toilet because the area over the sink is too low because the bathroom is under the stairway. I think I am going to get a vinyl wall quote to go there...or make a sign myself...not sure yet.
As for the paint color, I gotta let you in on a little secret.....I am not the biggest fan of blue for home decorating. I always turn to my beloved greens. I told myself I had to pick a color other than green this time!! So when I saw a picture of a bathroom that was similar to this, I fell in love with the blue! I just think it goes so well with the oil rubbed bronze and the wood colors. The color is called "Heritage" and its by Valspar, at Lowe's. Sorry I forgot to post that before!! I totally meant to!
The woodwork is actually Antique White. That was a mess up. Jim picked it up instead of the plain white, but I am happy he did. I like how it matches the vanity top and the towels. Good faux pas Jim!! ;-) I made sure to get WHITE when we painted the upstairs bathroom though, hehe.
That's pretty much it! Except for these:
My cute little owl towels! I found them at Goodwill for $1.99. I have always loved owls (a bit ironic that they are so "in" right now!) so this was a fun find, the perfect colors too!
I hope you enjoyed my little bathroom makeover. Keep an eye out for our upstairs bathroom's makeover. I will post those before pics soon!


